


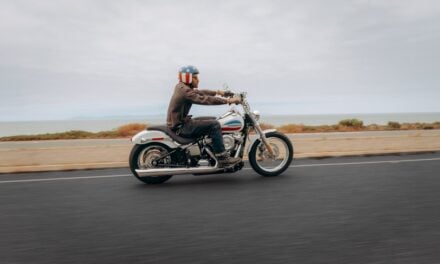
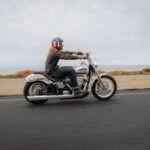
One of the few things (almost) as good as riding a motorcycle is the ability to share the roads, sights and experiences with others through video and with today’s tiny high-resolution cameras the options for riders are many and the sharing of content through the web is fast and simple. But just because you can simply strap on a GoPro or mount a Smart phone on your bars doesn’t mean you should be sharing any and every video in your social media channels. There are a few basic production elements you should consider prior to uploading or posting your video so viewers enjoy your recorded ride as opposed to blowing their beer nuts while watching a jumpy, poorly produced video. The beginning of this video exhibits what we mean. The balance of the ride, although fast, is quite smooth-

We ran a quick search for “Motorcycle Videos” on YouTube and rendered thousands of results – some of the content being interesting, compelling and watchable, other videos, not so much. Whether looking for reviews of your next bike or searching for information about a specific ride or upcoming bike rally, there’s a good chance you will run across content that is lacking in quality and certain basic considerations. So we thought it might be fun to share a few pointers around what makes an online motorcycle (ride) video watchable and enjoyable to the viewer. This helmet mounted recording shows some of the choppy content we find hard to watch for long periods of time-

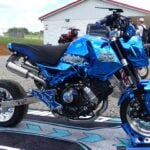
1.Keep your video brief and to the point. The web and small screen (smartphone / tablet) has created a generation of impatient viewers who will watch videos from 1 minute in length to maybe 10 minutes maximum – if your content is compelling. Be clear and have a point to your content to retain the viewer from beginning to end. Here is a great example of a well produced brief video using shots from a bike-mounted camera.

2. Try to pay attention to the lighting and the direction of the sun before and during your ride. Sun glare into your lens will render harsh lighting and poor detail of both your bike and the scenic road you are traveling. This can be difficult on a road full of twistys, so you can also check the angle of your camera and ensure it is pointing down towards your bars and the road ahead and not up at the sky. Take a moment before you roll to power up the camera and then watch the preview to check angles and framed content for light and color quality.

3. Audio is another important element often forgotten. If you are going to speak during your ride you must consider the location of the camera and how you will input audio. The best quality audio for voice dialogue and commentary is typically a microphone located inside a full coverage helmet. Depending on the type of bike you are on and exhaust you run, this can make a huge difference in whether people can hear your voice over the wind noise and other exterior noise (other riders, etc.). Many riders start their video with a brief introduction prior to mounting up and then they overlay music or other audio over the ride footage. This is a great way to hold your viewer through the entire video.
Note of Caution – YouTube, Facebook and other social sites run copyright algorithms to ensure proper use of registered music. Be aware that they will shut down your video if they discover any unlicensed use of your favorite rock band’s tunes. Take my word for it, I’ve learned the hard way, discovering one of my ride videos flagged with this-

4. HOLD STILL!! Seriously, please reconsider a helmet-mounted camera.
Let’s face it, most riders are very cautious behind their bars and are constantly checking their surroundings, intersections and looking left and right for safety reasons. While this is preferred to “keep the shiny side up”, it also delivers a video with way too much movement to enjoy the content. A few left and right checks for a turn are fine but if you insist on a helmet mounted camera you need to be cognizant of your head movements. A simple review of your content after a few miles can help you understand what to do as far as directing your video content from the seat. When shooting video with talking heads and not on the bike consider using a tripod or one of the new hand-held gimbals (Rob & I both use a Smove Mobile) to keep the camera steady. Both are great low-cost options for delivering high quality content.
5. At the risk of getting too technical, we recommend you pay close attention to your camera settings and the resolution you are shooting. Most smartphones and small mountable cameras shoot in 1080i /1080p or even 4K – but the truth be told, these high res versions are really unnecessary. It is very difficult to post produce, upload and render some of the larger files created at these high resolutions without the use of large powerful computers to move the files around, post produce and render out to a cloud-friendly size. We recently received a 9-minute video off an iPhone 10, shot in 1080 that was 21GB in size! That is a quality good enough for terrestrial (Cable/Satellite) TV broadcast. Keep in mind that most viewers will be on a mobile device connected to WIFI to consume the video. Truthfully, you can shoot in 1080i or 720p and render out very good quality for YouTube and general Web delivery. Even viewing on an Apple TV or Roku device, 720 will give you very acceptable quality. Most off-the-shelf video software allows for desktop transcoding down to a cloud friendly sized file. A good rule of thumb is keeping a 30-minute video to around 500 Megs maximum.

Now that you have a few tips, pick up that GoPro camera you’ve been eyeing, lay out your video timeline, determine how you plan to mount the unit, pick up the proper hardware to protect the camera during your ride, then get out there, ride and record! Like any media production, practice makes perfect and today’s recording devices are affordable and fun to use, so try shooting different angles (off the front fender or one of your saddlebags) and see what you get.
Share that content with friends and the world on the web and see what people think. Video is a great way to share your “Ride Life” and the excitement of two-wheeled wind therapy.
Phil


Great pointers and examples, Phil. I discovered a few errors I tend to make, so this was definitely helpful.